
A Step by Step guide to Browsing the Web through Wipeout: Pure.
by roto (mozy.org/psp/).
Written for the Engadget DS vs PSP hacks contest.
If you haven't been paying attention the past few weeks, you probably don't know that inside of the surprisingly decent and fun to play Wipeout: Pure game lies a feature-limited but still fairly usable web browser. Sony did a good thing by including 802.11b wireless networking in the PSP, good for playing multiplayer games and now good for browsing the web.
In this short article I will explain how to first jump straight into browsing the web from your PSP, followed by a step-by-step guide to setting up your own portals and jumping-off points for browsing the web. I will explain how to set up the required DNS and HTTP servers on both Windows and FreeBSD platforms (the latter can easily be applied to any Linux distribution with a bit of configuration file juggling). And I'll also include a guide on setting up a Proxy server, this step is optional for those without static or semi-static IP's. On the Windows side there is a fair amount of options for DNS/HTTP servers, but these two I've picked as decent and useable. I also decided to stay away from first party servers on the Windows platform for obvious reasons.
Some warnings before we start. You WILL need a wireless connection (this should be obvious), whether at home or somewhere else. In certain situations you will need totall access to the wireless router. I'm going to explain how to be able to access your "portal" from anywhere in the world using a combination of the DNS/HTTP setup but with a Proxy and a DynamicDNS account so that you won't need to worry about static IP addresses. But if you aren't going to go the proxy route you WILL need a public static IP address if you want to access your portal from outside of your LAN; if you're using someone else's WiFi connection you WILL need a static IP address to access YOUR portal. You can use your semi-static Cable/DSL address...but it will change sooner or later so you'll be left out in the cold. Depending on the service, your IP might not change for a month or so. One more thing, each WiFi router has its own "quirks", you will need to know how to work the router by yourself: you'll need to know how to forward ports and such, also on routers likethe ones made by D-Link in certain situations you will need to set DNS server settings to your local LAN server for this guide to work. I don't think I have to say this but you WILL need the game Wipeout: Pure, this is something alot of people seem to not pay attention to.
INDEX:
1 - Quick guide to get up and running so you could browse the web with your PSP. Uses pre-made "portals" from which to access online content. Easy.
2 - Guide to setting up your own Windows DNS and HTTP servers (TreeWalk for DNS and Abyss for HTTP, both are Freeware with no set time-limits.) to create a PSP portal.
3 - OPTIONAL - Guide to accessing your portal without needing a static IP (through a Proxy).
4 - Guide to setting up FreeBSD DNS and HTTP servers (BIND and Apache, both free and both available prebuilt from the Ports and Packages collection).
IP ADDRESS LEGEND:
WiFi Router = 192.168.2.123
Server (DNS/HTTP/Proxy) = 192.168.2.1
PSP = 192.168.2.33
- 1 - Give me the Web, NOW!
Ok, this one is the easiest. All you have to do is complete the following steps and you'll be browsing the web in no time.
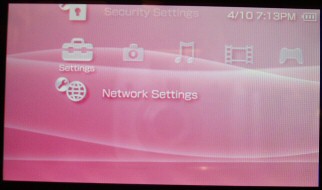
1.0 - Boot up the PSP into the system menu and enter "Network Settings"
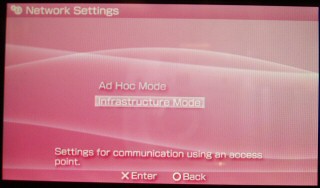
1.1 - Go into "Infrastructure Mode"
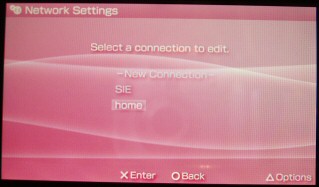
1.2 - Select a connection to edit. If you already have a wireless connection set up, select it from the list. Skip over entering the Connection Name, skip over the WLAN settings if you already have those set up.
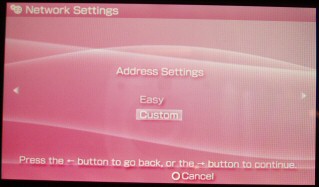
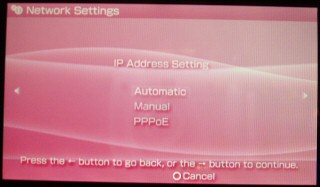
1.3 - In "Address Settings" click down to "Custom", leave "IP Address Setting" Automatic.
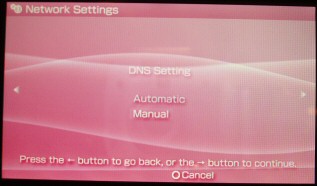
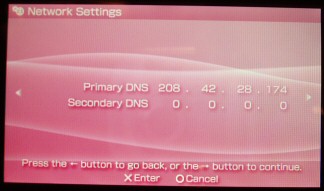
1.4 - In "DNS Setting" click down to "Manual". We'll be using the portal already set up by Engadget in this example. Note: There is also another very good portal set up by "fugimax" at DNS IP 67.171.70.72. But anyway, in the DNS Settings enter "208.42.28.174" as your Primary DNS IP and 0.0.0.0 as your secondary.
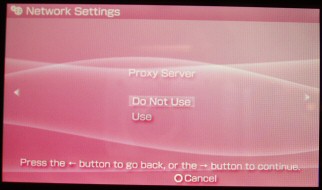
1.5 - In "Proxy Server" select do not use. Confirm everything and press "X" to save.

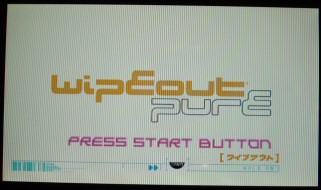
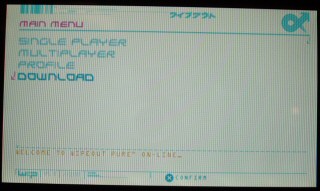
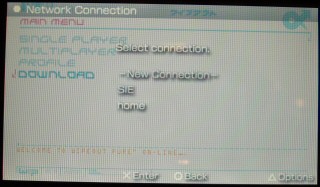
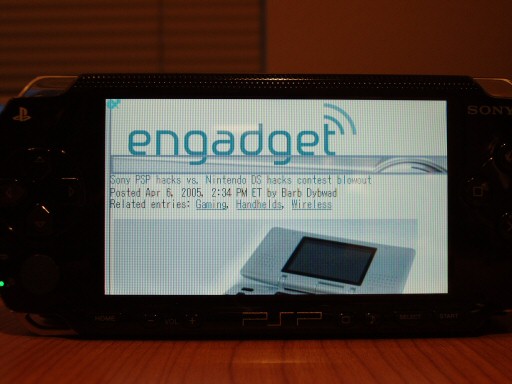
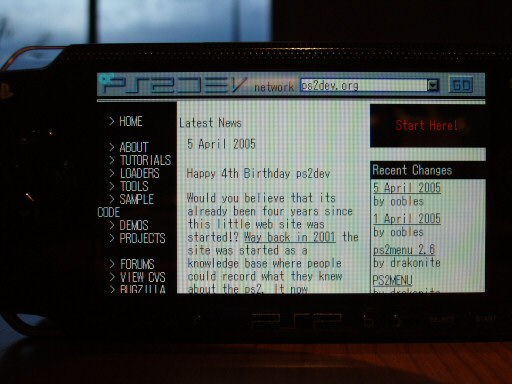
1.6 - You're set, launch Wipeout and go to the Downloads menu. Select your wireless network connection and any minute now you should see the Engadget portal.
- 2 - I want to set up my own portal!
Right, here we'll be setting up some servers on a Windows XP Professional machine. This is pretty involving, even for Windows. I'm going to go into as much detail as is necessary. Alot of things that I won't mention will be in the help files and instructional files of the said software. Abyss and TreeWalk are pretty nice and easy to use servers. They're also very much free. Free is good.
2.0 - Setting up the HTTP (Web) Server
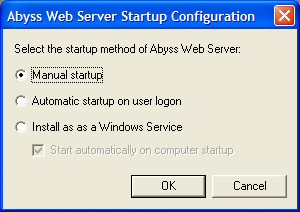
2.0.1 - Download and install the Abyss Web Server X1(http://www.aprelium.com/abyssws/). The installation is very easy, you can select whether you want to start the server Manually, Automatically or even as a Windows Service. I chose Manual start.
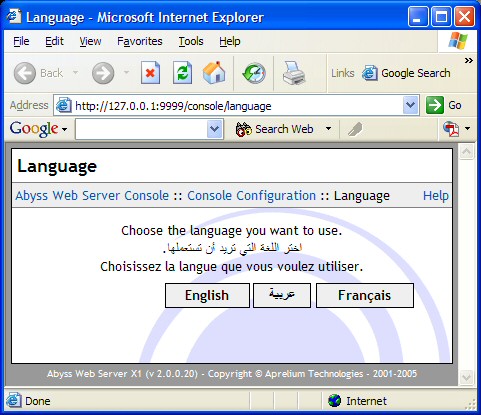
2.0.1.1 - You'll now be asked to enter some data to be able to access the configuration console of Abyss. Select your language.
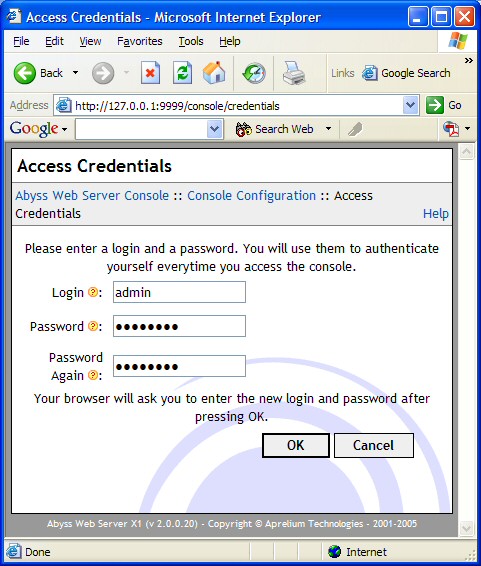
2.0.1.2 - Enter the ID and Password you want to use to access the config page of Abyss; obviously don't forget what you enter here..
2.0.1.3 - You are now in the Abyss configuration menu. Now depending on your machine, Abyss might not be running on your local LAN IP. That was the case with me. So I had to go into "Configure" menu ("Configure" button, next to Stop).
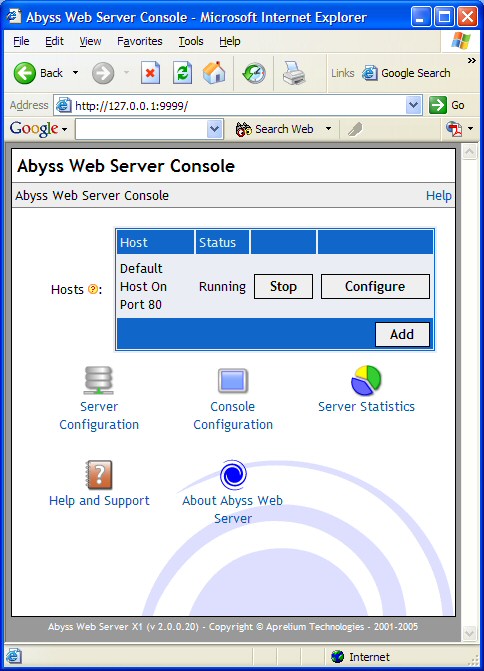
Followed by "General".
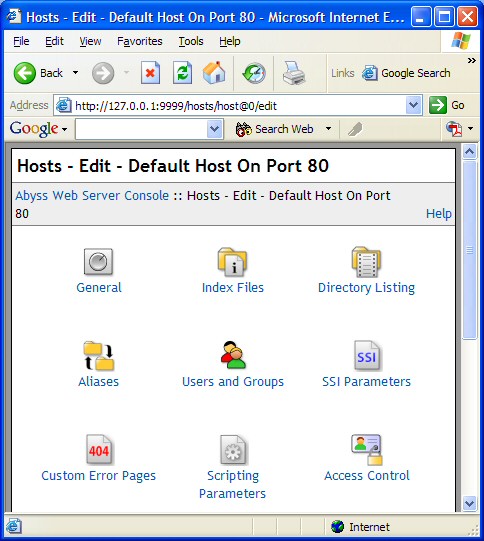
You're now in the General settings screen. Click the "Edit" button.
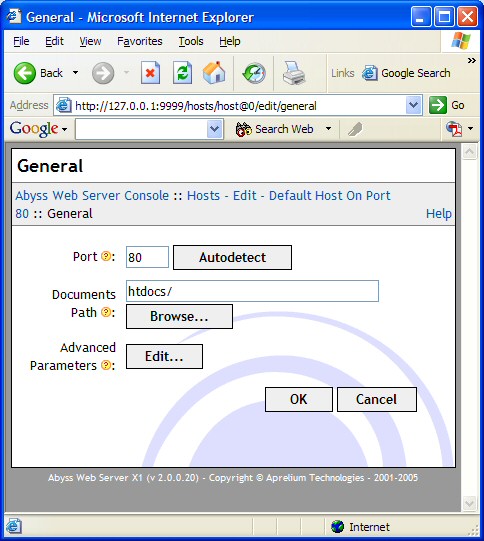
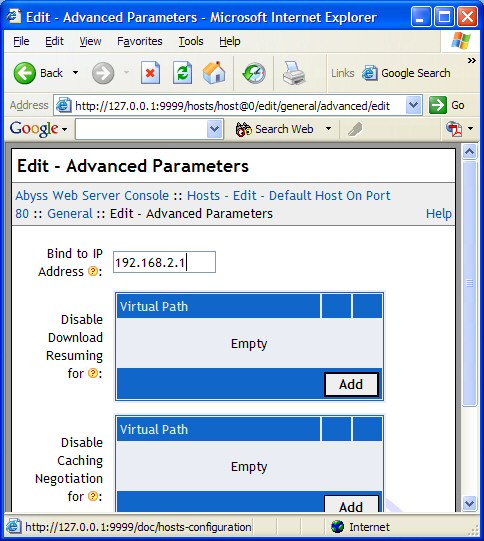
You are now in the Advanced Configuration screen. In "Bind to IP Address" enter your IP given to you by your router for the machine you are going to be serving pages from. In My case that was 192.168.2.1. Now Abyss will listen on 192.168.2.1 port 80. Click through the OK buttons and restart the server as required.
2.0.2.1 - Open up Windows Explorer and travel on to C:\Program Files\Abyss Web Server\htdocs and create a folder called "wipeout" in there.
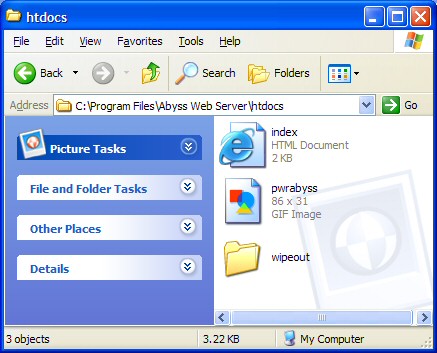
2.0.2.2 - Create an index.html with your code (such as links, etc) and place it in the wipeout folder. Or use the one I provided below. This one will start you off pretty good:
<html> |
2.0.2.3 - You're done with the HTTP server part
2.1 - Setting up the DNS Server
2.1.1 - Download and install TreeWalk DNS (http://ntcanuck.com/). Installation is easy and straight forward. The DNS server will start as a Service the next time you restart. You can turn off this option in the Administration options of your Control Panel. I did that, and I start the DNS server when I need it through the TreeWalk control panel in the Start Menu. You can use any other DNS server but I find TreeWalk to be easy and best of all free.
2.1.2 - We're going to set up the DNS Zone for scea.com here. (Remember, Wipeout accesses ingame.scea.com and we are going to fool the game into going to OUR server instead of the official one run by Sony). Open up Windows Explorer again. Point it to "C:\Windows\System32\dns\etc" and create a file called "scea.zone" (or just scea.txt) and put this into it:
| ; BIND db file for scea.com $TTL 86400 @ IN SOA scea.com fake.scea.com. ( 2005040201 ; serial number YYMMDDNN 28800 ; Refresh 7200 ; Retry 864000 ; Expire 86400 ; Min TTL ) ;This should cover ALL bases: NS 192.168.2.1 A 192.168.2.1 ingame A 192.168.2.1 webcluster A 192.168.2.1 $ORIGIN scea.com. |
2.1.3 - Oh almost forgot we need to tell our named server that we will be a master server for the scea.com zone. Do this by editing the file "named.conf" (still in the same directory). Add the following text to the bottom of "named.conf", this tells us that for "scea.com" requests we need to check the scea.zone file for mapping information:
| zone "scea.com" { type master; file "scea.zone"; }; |
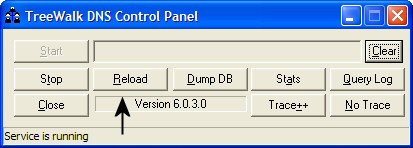
2.1.4 - Next go back to the TreeWalk DNS Control Panel and click "Reload". This is basically it, you may read the help file for more info on TreeWalk, but this is all you need so far to start off.
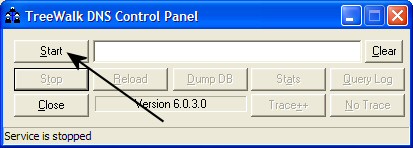
Now click start to start up your server (if its not already running):
2.1.5 - One more time go to the PSP Network Settings and this time for DNS server enter "192.168.2.1" (or whatever IP your server is). Basically repeat steps 1.1 through 1.6 except for the DNS server enter your server's IP.

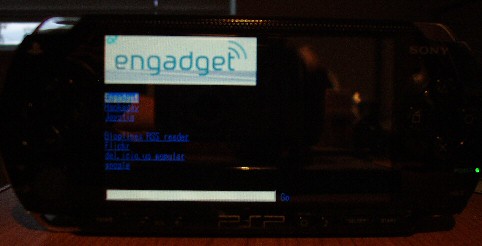
2.1.6 - Now fire up Wipeout, go to Downloads and connect. You should see this:
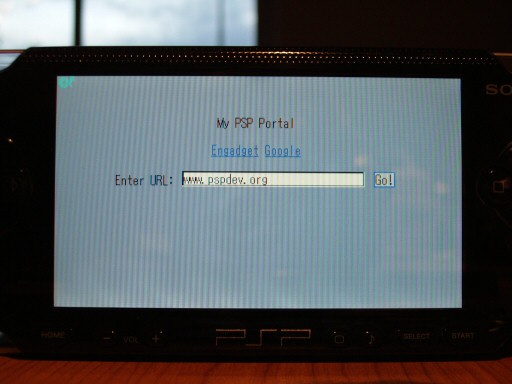

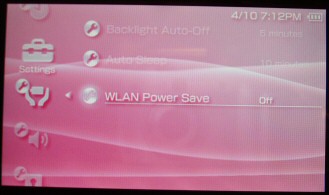
You can turn off WLAN Power Save for a slightly better connection.
- 3 - OPTIONAL - Lets do it through a Proxy.
You will need to have the windows DNS/HTTP servers for this step, its an optional step to be able to access your portal from anywhere on the net without needing a static IP. You can substitute any proxy you want in here but then you need to check your own settings. There are no pictures here, so pay attention to the words. Don't expect to set this up for anyone but a close group of friends because if you release this into the world...your ISP will kill you off for eating up bandwidth.
3.0.1 - Download and install Privoxy (www.privoxy.org or http://prdownloads.sourceforge.net/ijbswa/privoxy_setup_3_0_3-1.exe?download). This is yet another free server, free == good. Installation is typical. You can choose whether you want it to start up automatically or not, I chose not.
3.0.2 - Start up Privoxy and go to Options->Edit Main Configuration. Scroll down to 4.1 "listen-address" and change the listen-address line to "listen-address 192.168.2.1:8080"
3.0.3 - Kill Privoxy and restart it. Now your proxy is listening on 192.168.2.1 port 8080.
3.0.3 - Start up the Abyss HTTP server and TreeWalk DNS server.
3.0.4 - Configure your WiFi router to port-forward port 8080 from the WAN port to 192.168.2.1 (or your server machine). This you have to know how to do yourself.
3.0.5 - Go to www.dyndns.org and make yourself an account, follow the steps and activate the account. Create a hostname and set your IP to the IP given to you by your ISP (should be automatic). Download any dynamic IP update clients you want (thats left up to you). Once your DynDNS hostname is set up (ex. psp-proxy.dyndns.org) you can use that hostname as your proxy's address. This is much better than using the DNS trick because you can have the DynDNS IP automatically updated and the hostname won't change.
3.0.6 - Fire up your PSP and enter the network connection setup again. Go through steps 1.0-1.4 again but this time edit the proxy settings (Leave DNS Automatic). Enter your DynamicDNS hostname as the proxy and port 8080 as the...port. Thats it, try it out. If anything's not working double check all spelling and re-read this guide.
- 4 - I like my servers pure, thank you! (FreeBSD)
This guide is minimal, its not for beginners. I won't go into installing or configuring FreeBSD. Most of what you read here can be applied to any Linux distribution, with minor changes ofcourse. Here we are going to set up the DNS and HTTP settings on a FreeBSD machine. The configuration is surprisingly simple and easy. I'll be assuming that you already have FreeBSD 4.X or 5.X installed. There are small configuration differences between 4 and 5 so watch for those. Oh and if something's wrong here..sorry, I'm doing this from memory.
4.0.1 - Install the BIND DNS server if you don't already have one:
| roto@skyline$ cd /usr/ports/net/bind9 roto@skyline$ make install clean |
4.0.2 - Edit /etc/namedb/named.conf and add this to the bottom of the file:
| zone "scea.com" { type master; file "scea.zone"; }; |
4.0.3 - Create a "scea.zone" file in "/etc/namedb" by running "touch scea.zone" and use your favorite *nix text editor to add this to that file:
| ; BIND db file for scea.com $TTL 86400 @ IN SOA scea.com fake.scea.com. ( 2005040201 ; serial number YYMMDDNN 28800 ; Refresh 7200 ; Retry 864000 ; Expire 86400 ; Min TTL ) NS 192.168.2.1 A 192.168.2.1 ingame A 192.168.2.1 webcluster A 192.168.2.1 $ORIGIN scea.com. |
4.0.4 - Type "named.restart" and thats pretty much it for the DNS part.
4.1.0 - Install Apache:
| roto@skyline$ cd
/usr/ports/www/apache13 roto@skyline$ make install clean |
4.1.1 - I won't go into setting up Apache, its pretty easy but can get detailed. The default setup should work out of the box. Move to "/usr/local/www/data/" and create a directory (mkdir) called "wipeout", cd into wipeout and use your favorite text editor to write an "index.html" or just copy and paste and grab the portal.html that I provided above. Honestly, if you are already running FreeBSD you shouldn't even have to read this part. I don't have space to make this too detailed (such as instructions on INSTALLING FreeBSD...search the web for that) so this is about as detailed as I'll get. Your apache's documents directory may vary, so figure that out by yourself
4.1.1 - Do an "apachectl start" and "named.restart" and HOPEFULLY you are up and running. Thats it for this part. I don't think I'm missing anything important so you should be set.
THE END.
Thats pretty much all of it, hope you enjoyed reading this!
Thats pretty much all of it, hope you enjoyed reading this!
Thanks to:
Omlette
Engadget
Richard N.
FuMan
NeoG, |Laz| (for testing, thanks again!)